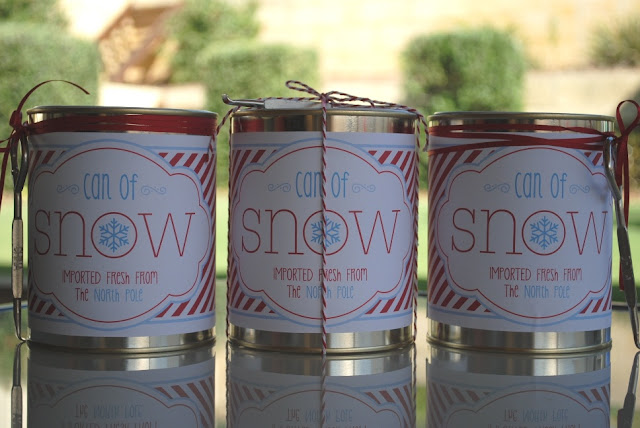
Can of Snow!

Friday, December 21, 2012


With the temperature set to hit 40 degrees here on Christmas Day, and the fact we live in Western Australia, there's absolutely no chance of snow ... or is there?

As soon as I saw this super-duper, cutesey-matootsey "Can of Snow" idea on How Does She yesterday, I knew immediately we were going to have snow at our house this Christmas.  I love it and the kids will too.  We can have a snowball fight, it can be sneakily placed around the house as Santa or reindeer footprints or we can use it to decorate.  I'm thinking we will probably go with the "fight" option and gather all the kids in the backyard for a bit of snowballing fun.  It'll not only be a different experience for them but after a couple of hours in the freezer, it'll cool them down too!

The supplies.

It's so simple to make.  This is what you will need:

  • Empty tins (I got mine from a Solver Paint shop for $3 each)
  • Lid opener (optional but cute - only 50c at Bunnings)
  • Sea Salt or Rock Salt (to fill 3 x 1L tins I used 2 x 1kg bags of salt)
  • Cornflour (I used 2 x 500g bags of cornflour)
  • Glitter

Mix it all together and voila! You have snow!


The very gorgeous labels are provided free for "How Does She" readers so if you want to get your hands on them, you will need to subscribe to How Does She.  I have been a subscriber for a while now and not only is their site absolutely beautiful, they always have fabulous ideas and are ridiculously creative.  They also regularly offer free printables so they are well worth subscribing to.  Go on, you'll be very happy you did.

So, will you be experiencing a white Christmas this year (a real one) or will you be like us and melting on Christmas Day trying hard to stay cool by throwing chilled cornflour at each other?!

A very Merry Christmas to you all and I hope you get to spend lots of lovely quality time with your family and friends.  Take care, stay safe and enjoy this very special time. xxx
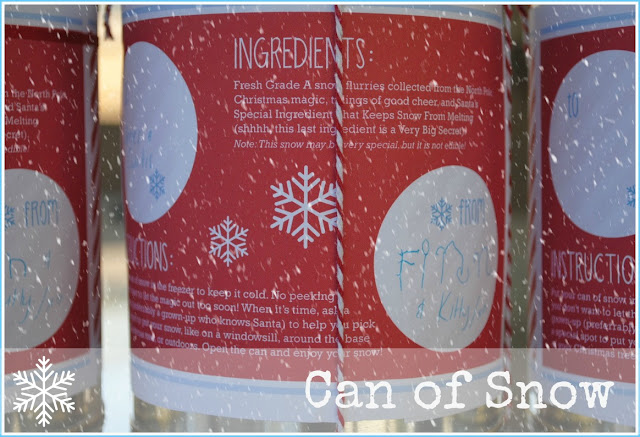
Kid's Xmas Straw Art

Monday, December 17, 2012

My son had some friends over for a play-date on the weekend and after they'd had their fill of trampolining, playing in the sand-pit, racing in the go-cart and building towers, and after we'd put little sister down for a sleep, we sat down for a quiet bit of Christmas crafting (it's always much quieter without little sister, and to be honest, quite a bit more enjoyable!). 

I had a big packet of straws left over from my work Xmas function so we decided to make some little straw Xmas decorations with them.  All we needed, other than the straws, were some pipe cleaners, some beads and a decorative something for the centre.

This is what we did:
  • Took 4 pipe cleaners and crossed them over each other at the centre to form a rough star or snowflake
  • Twisted the pipe cleaners over each other at the centre to keep it together (this is the only bit none of the kids could do, although they did try hard)
  • Once we had a a rough star/snowflake shape, we threaded each pipe cleaner with a piece of straw
  • We left about an inch of pipe cleaner out of the end of the straw which we threaded with a bead
  • We added another little inch of pipe cleaner to the end of each straw and again threaded with a bead
  • We then glued a decorative touch to the middle to hide the centre twist
Voila! A very kid-friendly, non-messy, easy Xmas craft project.


Both 5 year olds and the 9 year old really enjoyed making these, did a lovely job and could manage all but the twisting bit by themselves ... which always makes Mummy happy, especially when she's got a great coffee on the go!

My son also snuck in a couple of Christmas cards too.  The first is a cute Christmas Tree and the second is a ... rocket sleigh.  Of course it is. :)

Teacher Xmas Gifts

Tuesday, December 11, 2012


I struggled a bit this year with the "teacher appreciation" gifts - not the giving bit because I adore my son's teachers but the "doing" bit.   The problem is, and it could possibly be called an addiction, there is actually way too much online inspiration and way too many wonderful ideas, that one (me) has a tendency to just gaze (and dream) for long lengths of time at all this inspiration and with each new amazing thing I see, my decision changes as to what it is I'm actually going to do.  I then feel as if I'm going nutty with the indecisiveness of it all and my Martha brain just gets even more muddled! 

I don't actually know when, in all this fuzziness, I reached a decision but in the end I decided on little glass magnets and bought a super-easy (read no brain power involved) DIY magnet kit from "Stuck Together Magnets" on Etsy (my other addiction).  The kit comes with everything you need to create really cute, square and round, glass magnets. 
 
Source: Stuck Together Magnets

I decided to use my own cardstock for the backs of the magnets and cut the shapes to size using my Silhouette. The cardstock shapes included with the kit were perfectly fine but I wanted a theme & colours to suit my son's main teacher - something a bit zesty, fresh, quirky, colourful and a touch whimsical, which pretty much sums her up!  To personalise the magnets and to add a bit of fun, I stuck a vinyl letter on the cardstock first before attaching it to the glass, spelling out "Thank you xo". 


They were very easy to put together and because all the supplies are included in the kit the project can be quick and effortless. I made it a bit lengthier by putting in my own cardstock and letters but it still wasn't at all difficult.


I packaged the magnets in little glass spice jars from Spotlight, added some green cardstock to the underside of the lid and some washi tape to the outside.  I printed the label on kraft cardstock and cut them out using my scalloped paper punch.  The label reads, "It's the little things ... that make a big difference in our kid's lives.  Thank you for making a big difference in Finn's".  I then tied it all together with my trusty string.


I love the crispness and simplicity of glass and I think magnets make such a practical gift ... afterall, everyone's fridge could do with a few more, don't you think?